Welcome to a world where curiosity meets discovery, and little hands engage in the joy of learning through play.
Science, with its mysteries and marvels, is not just for school-aged students.
Even the youngest learners can embark on a journey of exploration, making sense of the world around them through simple yet profound experiments.
This blog offers educators and caregivers a collection of simple, engaging science experiments tailored for young learners.
Each activity is designed to spark curiosity, enhance developmental skills, and introduce basic scientific concepts in a fun, accessible manner.
From observing plant growth to understanding the principles of physics with ramps, these experiments are perfect for fostering a love of learning and exploration in preschoolers.
Why Play-Based Science Activities Are Important for Preschoolers
Introducing preschoolers to science through play ignites early interest in the world and lays the groundwork for future learning in science, technology, engineering, and math (STEM) while supporting key developmental areas.
The Role of Play in Learning
Young students learn best through play, from understanding basic science concepts to enhancing problem-solving skills, fostering creativity, and building foundational literacy and numeracy skills.
This hands-on approach also nurtures their social and emotional development, teaching them the value of teamwork, empathy, and effective communication.
Incorporating play into science learning supports cognitive development and sparks creativity, making complex ideas more accessible and engaging for young learners.
Development of Key Skills
Science activities are instrumental in developing a wide range of skills in preschoolers. They not only lay the groundwork for scientific thinking but also enhance problem-solving abilities and fine motor skills.
Through hands-on experiments, learners discover cause and effect, learn to make predictions, and develop the dexterity needed to manipulate tools and materials.
Engaging in science activities also boost language development and literacy as children learn to describe their observations and experiments.
Fostering Confidence and Curiosity
Curiosity drives learning, and science experiments are a perfect channel for preschoolers to express and expand their curiosity.
As they ask questions, test out their ideas, and see the results of their actions, young learners build confidence in their ability to learn and understand new concepts.
This self-assuredness is crucial for their future educational journey.
Promoting Cooperative Learning
Science experiments teach preschoolers valuable lessons in teamwork and respect for others' ideas, crucial for their social and emotional development.
Preschoolers learn to share resources, listen to different viewpoints, and appreciate the value of working together towards a common goal.
These social skills are as important as academic ones for learning and development of young minds.
Promoting Communication
Effective communication is another significant benefit of play-based science activities.
As preschoolers describe their observations, articulate their hypotheses, and discuss their findings, they develop both their language skills and their ability to communicate complex ideas.
This not only aids in their academic growth but also in their social interactions.
Preparing for Success: Conducting Science Experiments with Preschoolers
Creating a positive and productive environment for science experiments will set the stage for meaningful learning experiences.
Here are some tips to ensure success.
Creating a Conducive Learning Environment
A well-prepared environment is key to engaging preschoolers in science activities. This means setting up a space that is safe, inviting, and equipped with the right materials.
Ensure that the area is free of hazards and that all materials are non-toxic and age-appropriate to foster a setting where learners feel free to explore.
Choosing the Right Experiments
Selecting experiments that are suited to the developmental stages of preschoolers is crucial. Look for activities that are simple enough to follow but also open-ended to encourage exploration and inquiry.
The goal is to spark interest and curiosity, not to overwhelm with concepts that are too complex.
Materials and Safety
Organize all materials in advance and ensure they are readily accessible to the children. Clear instructions and close supervision are essential to keep the activities safe and focused.
Always have a plan for clean-up and dealing with spills or accidents to maintain a safe learning environment.
Encouraging Participation and Engagement Through Differentiation
Every preschooler should feel included and capable of participating. Open-ended experiments and activities are particularly beneficial, offering flexibility that accommodates learners with diverse needs and learning styles.
These adaptable approaches ensure that all students can engage at their level, promoting inclusivity and a sense of achievement.
Strategies such as small group work or pairing learners with different strengths further ensure active involvement.
Encourage questions and exploration, guiding learners gently back to the task if they become distracted, and fostering an environment where every child feels valued and supported in their curiosity.
Maximizing the Learning Experience
To deepen the impact of science experiments, consider these strategies for enhancing learning even further.
Ask Open-Ended Questions
Pose open-ended questions to stimulate thinking and discussion.
Questions such as "What do you think will happen if...?", "What did you see?" or "Why do you think that happened?" encourage learners to think critically about their observations and articulate their understanding of the experiment.
Help Students Document Their Observations
Encourage preschoolers to talk about what they see, hear, and feel during experiments.
This can be through drawing, using simple charts, or even taking photographs.
Documenting their observations helps solidify their learning and provides a reference point for further discussion and understanding.
Connect Science with Everyday Life
Relate the concepts learned in experiments to everyday life for the students.
This relevance helps preschoolers see the value and application of science in their daily lives, enhancing their engagement and retention of the concepts explored.
By incorporating these elements into your planning and execution of science experiments for preschoolers, you create a rich, engaging, and educational experience that not only teaches them about the world around them but also builds essential skills for future learning.
Our Favorite Easy-to-Implement Science Experiments for Preschoolers
Here's our selection of engaging experiments, each crafted to ignite curiosity and encourage exploration in young learners.
These hands-on activities are designed to make learning both fun and educational, seamlessly blending play with scientific discovery.
Let's explore these exciting experiments that promise to captivate and educate preschoolers.
1. Solubility Challenge
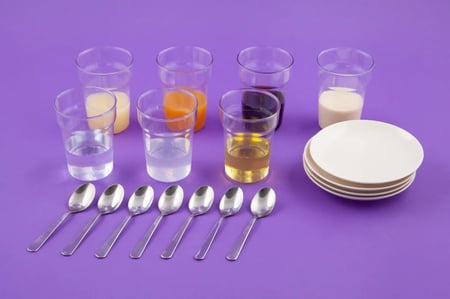
Dive into the "Mixing Magic" experiment, where preschoolers become scientists exploring the mix-and-match world of liquids.
This hands-on activity sheds light on the intriguing behaviors of different liquids when combined, offering a playful introduction to the concept of solubility.
Materials Needed:
- Cups for various liquids
- Teaspoons
- Ice tray, lids, or small plates
- A variety of liquids: skimmed milk, cola, water, orange juice, vinegar, lemon juice
Instructions:
- Arrange each liquid in separate cups for easy access.
- Encourage children to observe and describe the color and smell of each liquid, noting unique properties.
- Experiment by mixing liquids together, observing which combinations mix well.
- Facilitate a discussion on the children's observations, guiding them to understand the properties that influence liquid mixing.
Learning Outcomes:
- Enhances sensory observation skills, focusing on visual and olfactory properties.
- Introduces the scientific concept of solubility in an accessible manner.
- Develops fine motor skills through careful measuring and pouring.
- Promotes critical thinking and communication as children discuss their observations and conclusions.
2. Oil and Water: Do They Mix?
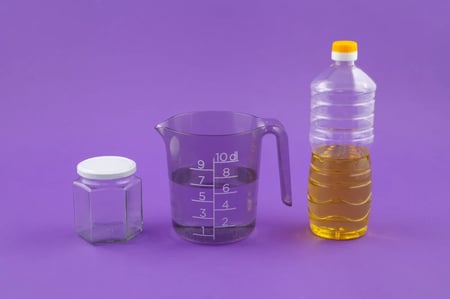
This experiment reveals the fascinating separation between oil and water.
Through simple mixing and observation, preschoolers learn about density and the unique characteristic of immiscibility in a fun, visual way.
Materials Needed:
- Small transparent jars with lids
- Oil
- Water at room temperature
Instructions:
- Half-fill each jar with room-temperature water.
- Add a splash of oil to each jar, then tightly secure the lids.
- Gently shake the jars and watch as the oil separates and floats above the water.
- Engage the children in a discussion about their observations, exploring the reasons behind the separation.
Learning Outcomes:
- Introduces preschoolers to density in an understandable format.
- Helps sharpen observation skills.
- Enhances verbal skills as children articulate their observations and engage in group discussions.
3. Sink or Float Experiment
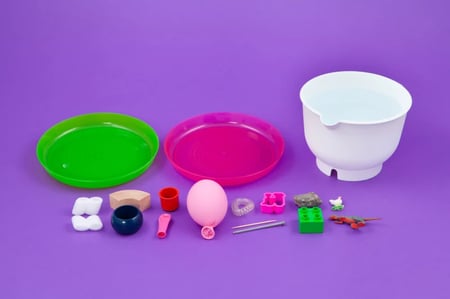
A classic experiment that captivates young minds, the Sink or Float activity is perfect for introducing preschoolers to concepts of buoyancy and density.
It's an interactive way to develop critical thinking as children predict and observe the behavior of various objects in water.
Materials Needed:
- A clear container filled with water
- A variety of objects of different weights and materials (e.g., plastic spoon, metal key, wooden block, rubber ball)
Instructions:
- Before starting, ask the children to predict whether each object will sink or float when placed in the water.
- Have them sort the objects into two groups based on their predictions.
- One by one, place the objects in the water and observe what happens.
- Ask students to sort the objects again based on their observations.
- Discuss the results. Were the predictions accurate? Why did some objects sink while others floated?
Learning Outcomes:
- Children will learn about buoyancy and density
- Preschoolers will enhance their observational and reasoning skills.
- This experiment also encourages discussion about the properties of materials, fostering language development and scientific thinking.
4. Blubbery Invention: How Do Animals Stay Warm?
Discover how seals stay warm in icy waters with the "Blubber Experiment."
This activity demonstrates the insulating power of blubber, allowing children to feel firsthand how fat acts as a natural barrier against the cold.
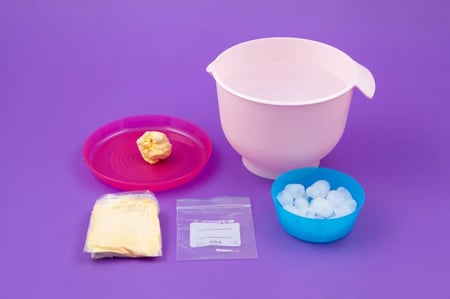
Materials Needed:
- Ice water in a large container
- Two plastic bags (one should fit inside the other comfortably)
- Margarine or shortening to act as blubber
- Disposable gloves (optional)
- Plates for observing margarine
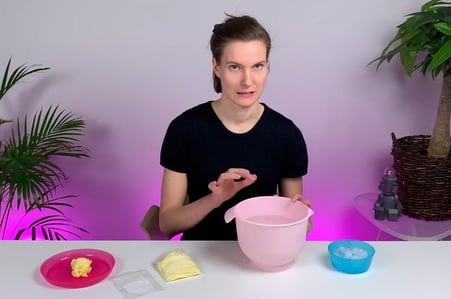
Instructions:
- Begin by inviting the children to briefly place their hands in the ice water to experience the cold, mimicking the chilly environment seals thrive in. For younger children, describe the sensation vividly if they're hesitant to try.
- For children, especially those ages 3-4, who might be reluctant to directly touch the cold water or the margarine, suggest wearing a disposable glove first. This can make the experience more comfortable, ensuring everyone can participate.
- Show the children the "blubber glove" — one plastic bag filled with margarine, sealed, and then placed inside another bag. Let them explore its texture and guess what's inside. Use this moment to introduce the concept of blubber as an insulator.
- Encourage the children to dip their blubber-gloved hand into the ice water. Have them compare how the water feels through the glove versus the initial sensation with bare hands. Use storytelling to make this more engaging for younger children, perhaps by pretending their hand is a seal diving into the ocean.
- Place a small amount of margarine on plates for observation. Discuss its color and texture, and relate it to the substance inside the blubber glove. This visual and tactile comparison helps solidify the understanding of blubber's properties.
Learning Outcomes:
- Children grasp the concept of insulation and how it helps marine animals, like seals, maintain warmth in cold waters.
- The experiment fosters sensory exploration, enhancing observational skills through direct comparison of sensations.
5. Bees at Work
This exciting experiment immerses preschoolers in the fascinating process of pollination.
By using pom-poms as bees, children simulate the vital role these insects play in transferring pollen between flowers.
This hands-on activity not only educates about the importance of bees in nature but also sharpens observational and interpretive skills through a fun and interactive approach.
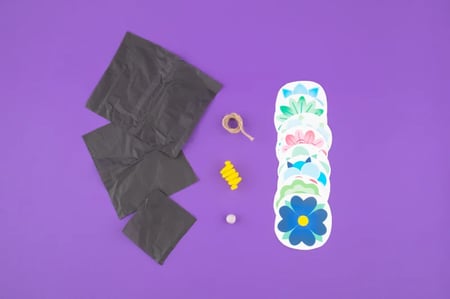
Materials Needed:
- Teaspoons
- Cupcake liners
- Cocoa powder
- Cornstarch
- Ready-cut flower pictures
- A large pom-pom for each child (to represent the bee)
- Plate
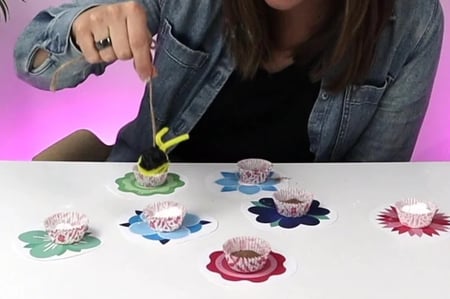
Instructions:
- Arrange the flower print-outs on a table, placing cupcake liners at the center of each to serve as the flowers' centers.
- Show the children the cocoa powder and cornstarch, encouraging them to explore these powders' look, smell, and feel.
- Discuss any prior experiences they might have had with similar substances.
- Fill some cupcake liners with two teaspoons of cornstarch and the rest with two teaspoons of cocoa powder, illustrating different types of pollen.
- Give each child a large pom-pom, explaining that it represents a bee going on a flower-visiting journey to collect pollen.
- Have the children decide which flower their bee will visit first based on the "pollen's" appeal.
- Assist the children as they dip their pom-pom bees into the "pollen," then move from one flower to another, noting how the powders adhere to the pom-pom.
- After the bees have visited several flowers, observe the mixed powders in the cupcake liners to see the effects of the bees' pollination work.
- Discuss the observed mixing process and examine the amount of "pollen" collected on each bee by gently shaking the pom-pom over a plate.
- Wrap up by discussing the critical role bees play in nature, highlighting how their pollination activities lead to the growth of new plants and seed production.
Learning Outcomes:
- Children gain an introductory understanding of pollination and the indispensable role of bees in ecosystems.
- Enhances observational skills as children see firsthand how "pollen" sticks to their bee and mixes in the flowers.
- Promotes critical thinking and encourages children to interpret their observations, deepening their understanding of natural processes.
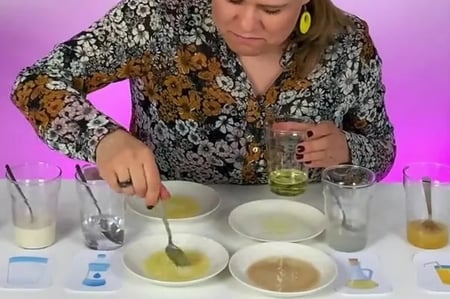
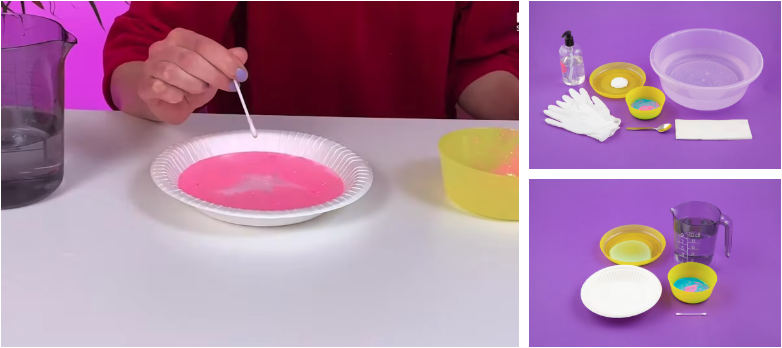
6. Exploring Surface Tension with Magic Milk
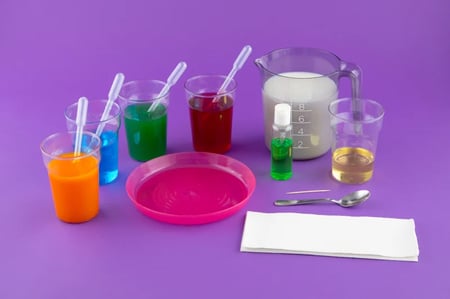
Dive into the mesmerizing world of colorful moving ponds! This experiment combines the wonders of chemistry and art, allowing children to observe the interaction between oil, milk, and food coloring.
It's a fantastic way to explore solubility, surface tension, and create beautiful, dynamic art.
Materials Needed:
- Soup plates
- Pipettes
- Teaspoons
- Transparent jars
- Toothpicks
- Milk
- Cooking oil
- Food coloring (various colors)
- Dishwashing liquid
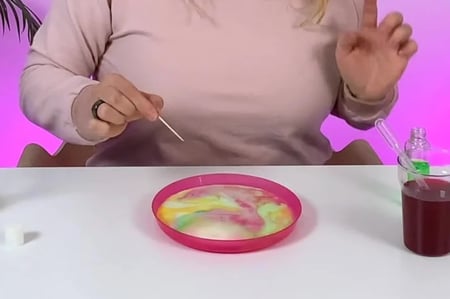
Instructions:
- Fill a soup plate with milk to cover the bottom, setting the stage for your art canvas.
- Carefully add a teaspoonful of oil to the center of the milk, forming one large droplet, and observe the interaction. Discuss why the oil doesn't mix with the milk, introducing the concept of solubility.
- Next, add three large drops of food coloring to the milk's surface. Watch how the colors behave on the milk, sparking a conversation about water-soluble substances.
- Experiment with drawing on the milk's surface using the oil droplet and a colored droplet. Notice the differences in how they interact with the milk. Attempt to write the first letter of your name with the colored droplets, just like creating art on water.
- Add more food coloring until the milk's surface becomes vibrant. Explore what happens when you introduce a drop of colored water inside the oil droplet, observing how the color remains encapsulated.
- Use toothpicks to gently make shapes and patterns in the colored milk, observing the movement of oil and colors.
- For the grand finale, dip a toothpick into dishwashing liquid and then touch it to the milk's surface. Repeat in various places and watch as the colors move and ripple, creating a dynamic art show. Discuss the effect of dishwashing liquid on water's surface tension and how it causes the colors to spread and move.
Learning Outcomes:
- Children will learn about the principles of solubility and surface tension, understanding why some substances mix while others don't.
- The experiment encourages precise measuring and fine motor skills as children manipulate droplets of oil and food coloring.
- Discussing the interactions between the liquids enhances critical thinking and communication skills as children articulate their observations and hypotheses.
7. Dissolving Mysteries: Where Did the Salt Go?
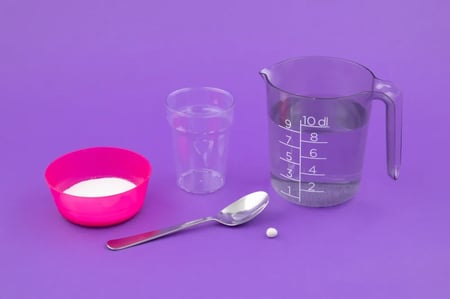
Dive into the "Salt Water Mystery" experiment, where young scientists explore the whether salt disappears in water.
This simple yet intriguing activity demonstrates solubility and challenges the notion of disappearance, proving that just because something becomes invisible doesn't mean it's gone.
Materials Needed:
- Warm waterSalt
- Spoon
- Clear jar or cup
- Tape or Poster putty
Instructions:
- Start by examining the salt and water separately, encouraging observations about their appearance, texture, and smell. Discuss and identify each substance.
- Fill the clear jar with warm water, measuring about three finger-widths high. Use tape or poster putty to mark the water level on the jar.
- Stir in one spoonful of salt, ensuring it's thoroughly mixed. Slowly count to ten together, observing any changes.
- Discuss observations: Did the water's appearance change after adding the salt? What happens when you mix the salt in water?
- Encourage guesses about where the salt went after it "disappeared."
- Add four more spoonfuls of salt, mixing thoroughly again. Spend more time observing the mixture this time to see the effects of adding more salt.
- Explain that the salt hasn't disappeared; it has dissolved, making it invisible to the eye. Check the water level against the initial mark to see if it has changed, indicating that the salt is still present.
- Discuss how students can check that the salt is still in the water by tasting it (although they will not do that at this time).
- Conclude by discussing the results of the experiment. Confirm there was no thief, just the salt dissolving in water, becoming part of the liquid.
Extension Tips:
- Experiment with other soluble substances to see if they behave like salt.
- Experiment with other substances that do not dissolve and discuss the differences.
- Try the experiment with different water temperatures to observe how temperature affects solubility.
Learning Outcomes:
- Children practice precise measuring and observation skills.
- The experiment introduces the concept of solubility, showing that substances can dissolve in water without disappearing.
- Encourages critical thinking and hypothesis testing as children ponder the mystery of the "disappearing" salt.
8. What Makes a Living Thing ‘Living’?
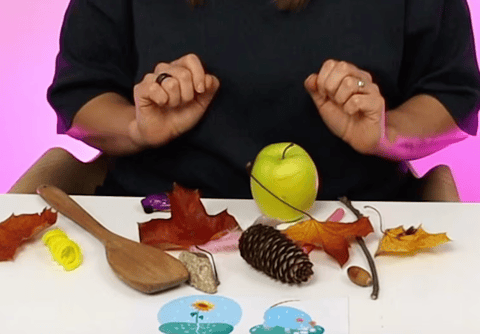
Step into this living vs. non-living mystery, where young scientists investigate why some things seem to "drink" water—while others don’t.
This hands-on exploration begins with children’s own observations and categories, then builds toward a shared understanding of what it means to be alive.
Materials Needed:
- Baskets or bags for collecting items (1 per group)
- Clear jars with flowers in water (prepared a few days ahead)
- Clear jars with rocks in water (same time as the flowers)
- Printed picture of a flower and a rock (optional)
- Feature cards (images or labels for: drinks, grows, moves, breathes, etc.)
Instructions:
- Begin by sharing what you noticed:
A few days ago, we placed flowers in jars of water. Today, the water is mostly gone. But the rocks we put in water haven’t changed at all. Why would the flowers use water—but not the rocks?
Now it’s time to investigate.
- In small groups, have students go outside and collect a mix of natural items—aim for 6–10 per group. Items like twigs, leaves, feathers, pinecones, and stones all work well.
Note: If learners find insects or other live animals, observe them where they are and leave them outside.
- Back inside, gather as a group. Lay out all the collected items and invite the children to begin sorting. They can use any criteria they choose: soft vs. hard, rough vs. smooth, colorful vs. dull. There are no wrong answers at this stage.
- Ask:
- Why did you group those together?
- What made you decide to separate those?
- After sorting by their own ideas, revisit the opening question: Why did the flower "drink" but the rock didn’t?
Introduce the idea that some things might need water. Can they re-sort the objects based on whether they think the item needs water?
- Next, explore more traits. Use the feature cards one at a time:
- Does it grow?
- Does it move?
- Does it breathe or take in air?
- Does it make waste?
With each trait, discuss and re-sort as needed. It’s okay if there’s disagreement—some objects (like seeds or dried leaves) may be tricky to classify. Encourage thoughtful conversation.
- Use the flower picture to represent living things and the rock to represent non-living things. Ask: What do the living things all have in common?
Learning Outcomes:
- Strengthens observation and categorization skills
- Introduces key features of living things through guided discovery
- Encourages collaboration, flexible thinking, and evidence-based reasoning
- Builds language for describing and comparing the natural world
9. Hiding in Plain Sight
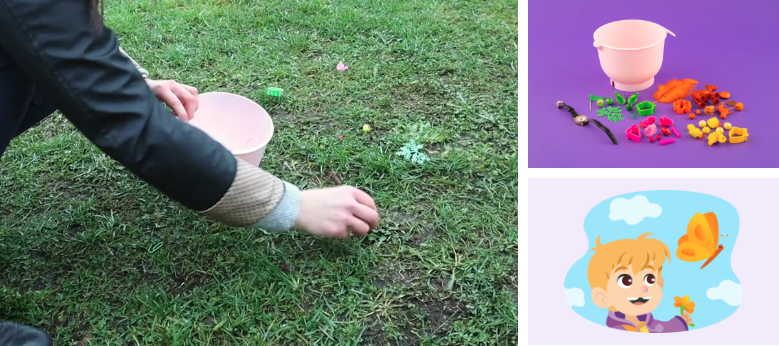
In this experiment, young scientists become predators on the hunt—searching for hidden “butterflies” in plain sight.
As they play, they’ll uncover how color helps animals blend into their environments. This leads to a key idea: camouflage helps some animals stay safe by making them harder to see.
Materials Needed:
- Small toys in a variety of colors
- Outdoor surface (e.g., grassy area or sandbox)
- Buckets or bins for collecting toys
- Timer or stopwatch
Instructions:
- Set the Scene
Begin with a simple story prompt:
Imagine you’re a bird flying high above the ground, looking for something to eat. Below, butterflies are resting quietly. But some of them are easier to see than others. Why?
Let students know they’ll act as predator birds trying to find hidden butterflies (the colored toys).
- Prepare the Area
Choose an outdoor surface such as a grassy patch or sandbox. Scatter toys randomly across the area while students are not looking.
- Begin the Hunt
Have students close their eyes and count to 20. When the countdown ends, give them 30 seconds to find as many toys as they can—one at a time—and drop them into their bucket or “bird belly.”
- Observe and Discuss
Gather students together and sort the collected toys by color. Ask:
• Which colors were easiest to spot?
• Which toys were hardest to find?
• Why do you think that is?
Send students back out to find any remaining toys. Once all are collected, compare again:
• Were the ones left behind a certain color?
• Did they match the surface (e.g., green toys on grass, tan toys on sand)?
• Did the size or shape of the toy affect how well it hid?
- Extend the Activity
If you'd like, repeat the experiment in a new area (such as a sandbox). Ask:
• Did the colors that were hard to find before stand out more now?
• What changed?
Learning Outcomes:
- Introduces the idea of camouflage in a hands-on way
- Builds early observation, sorting, and comparison skills
- Encourages movement, teamwork, and reflective discussion
- Supports science talk and early evidence-based reasoning
10. Mystery Messages
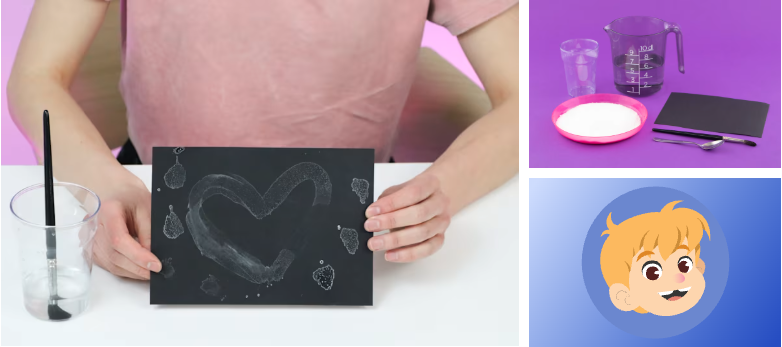
In this experiment, young scientists mix up a batch of invisible ink—and uncover what makes it reappear.
As they stir, paint, and wait, they’ll observe how a material can disappear into water but show up again later. The mystery leads to early ideas about dissolving, evaporation, and how some things can be present even when they can’t be seen.
Materials Needed:
- Warm water
- Salt
- Clear jars or cups
- Teaspoons
- Black paper or dark card
- Paintbrushes
Instructions:
- Start with a message from another class:
Hello Scientists,
While reading a mystery story with my class, we found a recipe for secret detective messages—and we just had to try it!
The instructions said to mix salt and water and paint with it on black paper. But when we tried, our message didn’t show up at all. The salt seemed to disappear!
Can you help us figure out what went wrong?
Thank you,
A Fellow Scientist (and Mystery Lover)
- Observe the two ingredients: salt and water. What do they look like? Feel like? Ask students to describe each one using their senses.
- Pour warm water into a clear jar—about halfway full. Add one spoonful of salt and stir. Ask: Can you still see the salt? Where do you think it went? Add another spoonful of salt. Stir again and observe. Continue adding and stirring one spoonful at a time.
- Introduce the idea: when a material disappears into water, it might have dissolved. Even if you can't see it, it’s still there. Add more salt. Keep stirring. After each one, pause to check if the salt disappears. Wonder together: Is the salt really gone—or just hidden in the water? Keep going until the salt stops dissolving and begins to collect at the bottom. Let the mixture sit while you get out the black paper and paintbrushes.
- Write Secret Messages. Use a paintbrush to dip into the saltwater and paint on dark-colored paper. Ask students to guess what might happen when the water dries.
- Set the paper aside to dry fully. Once dry, inspect the page closely—what do they see? The salt reappears, leaving a visible message
- Ask students:
• Where did the salt go when it was stirred into the water?
• Why can we see it again after the water dries?
• What might have gone wrong for the other class?
Guide them to conclude that the salt was in the water the whole time—it just dissolved and became invisible. When the water evaporated, the salt stayed behind on the paper, revealing the message.
Learning Outcomes:
- Explores how materials dissolve and reappear
- Introduces concepts of solubility and evaporation
- Encourages close observation, creativity, and scientific thinking
11. Mysterious Directions
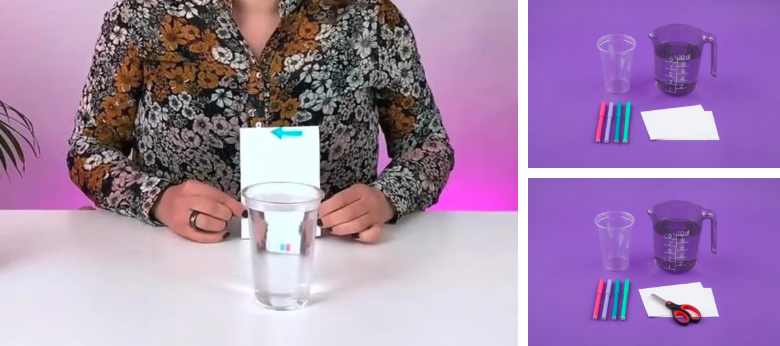
In this playful experiment, students explore how water can change what we see—like making an arrow appear to point the opposite way.
As they investigate, they’ll learn that water can bend light and shift images. It’s a surprising discovery that sparks observation and early critical thinking.
Materials Needed:
- Clear glass
- Water (in a jug)
- White paper
- Colorful markers or pens
- Prepare the Demonstration
Before gathering students, draw a large, bold arrow pointing either left or right on a small piece of paper. You’ll use this during the experiment to show what happens.
- Try It Together
Pour water into the glass until it’s about halfway full.
Hold up the paper with the arrow behind the glass and invite students to observe. Ask:
• Which way is the arrow pointing?
Now slowly move the paper back about the width of three hands. Look through the water again.
• Does the arrow still point the same way?
• What changed?
Lift the paper higher (so it’s no longer behind the water) and ask again.
• Can you still see a difference?
Let students try it for themselves in pairs or small groups if possible. Encourage them to move the paper closer and farther to observe what happens at different distances.
- Compare With and Without Water
Pour the water out of the glass. Hold the same arrow behind the empty glass.
Ask:
• Does the arrow still flip?
• What’s different now?
- Experiment With New Drawings
Invite students to draw their own pictures to test behind the glass. Ideas include:
• A fish swimming left or right
• A letter or number
Ask them to predict:
• What will happen to this drawing when I look through the water?
- Then test and compare their results.
Learning Outcomes:
- Encourages early observation and prediction skills
- Introduces the idea that water bends light, changing how things appear
- Builds vocabulary around direction, change, and what we see
- Supports communication and discussion around scientific finding
12. HOMEMADE Glue
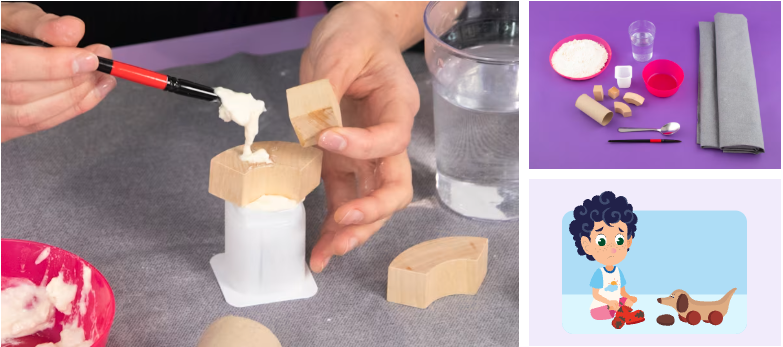
In this experiment, learners mix their own glue and use it to build something from recycled materials. First, they’ll test different mixtures to find what sticks best—then put it to the test in a real project.
Note to teachers: A few days before doing this activity, let learners know they’ll be working on a special building project. This helps build anticipation and gives time to collect clean recycled materials from home—like small boxes, tubes, or containers. Don’t tell them yet that they’ll be making the glue themselves.
To set the stage, the teacher might say: “Oh no! We were all ready to build with these boxes and tubes—but we ran out of glue! Do you think we can make our own?”
Materials Needed:
- Bowls of all-purpose flour
- Water
- Spoons
- Small bowls
- Paintbrushes
- Construction or recycled materials (toilet paper rolls, small boxes, etc.)
- Table covering or tray
Instructions:
- Observe the Materials
Start by showing students the flour and water. Let them smell and touch each one.
Ask:
• What do these feel like?
• What do they smell like?
• Do you think we can turn these into glue?
Tell students: “Let’s try making our own glue by mixing flour and water.”
- Mix and Experiment
Let each student start by measuring one spoonful of flour and one spoonful of water into a small bowl. Have them stir with a spoon or paintbrush.
Ask:
• What does it feel like?
• Is it sticky yet?
Let students keep experimenting. They can try more flour or more water and compare the mixtures. Encourage careful counting of spoonfuls to support early math skills.
Teachers should be ready to support learners as they test and adjust their glue. You can gently guide them to thicker, stickier mixtures if needed.
- Test the Glue
Once students have a glue mixture they like, give them time to build something. They can use small boxes, tubes, or other scrap materials. Have them apply the glue with brushes or spoons.
- Ask:
• Does your glue hold things together?
• What worked well?
• What would you change next time?
Learning Outcomes:
- Observe how mixing changes materials
- Practice measuring and counting
- Explore problem-solving through trial and error
- Use creativity and descriptive language during building
13. Why Are Some Things Slippery?
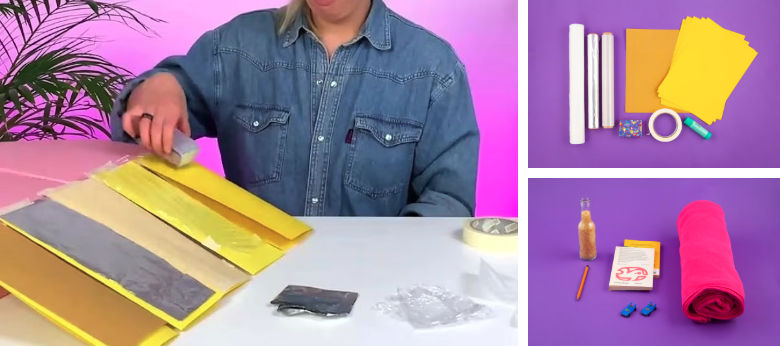
In this experiment, young scientists explore what makes some surfaces easier to slide on than others. First, they’ll watch a demonstration. Then, they’ll build and test their own ramps using different materials to find out which ones are more slippery.
Materials Needed:
- 2 premade ramps for the teacher (same size cardboard):
- One covered with foil
- One covered with sandpaper
- Cardboard pieces (cut to ramp size) for students
- Materials for students to choose from:
- Baking paper or wax paper
- Plastic wrap
- Fabric
- Paper
- Sandpaper
- Tape or glue
- Small cardboard boxes or toy cars
- Books or blocks to raise the ramps
To start:
Have you ever gone down a slide that felt too slow? Or one that was so slippery you zoomed right off the end? Let’s figure out why that happens. We’ll use mini slides to see how different surfaces affect how fast things move.
Instructions:
- Teacher Demonstration
Show how one box slides down the foil-covered ramp and another slides down the sandpaper ramp.
Ask:
o “Which box moved faster?”
o “Why do you think that happened?”
Explain: “Some surfaces are smooth and help things slide. Others are rough and slow them down. That’s called friction.”
- Student Investigation
Give each student or small group two ramp pieces and ask them to choose two different materials to test. Help them attach the materials with tape or glue.
Raise the ramps using books or blocks and let students slide their boxes or toys down one at a time. Encourage them to test each ramp a few times.
- Talk and Compare
Gather together to share what they noticed. Ask:
o “Which of your ramps was faster?”
o “Which one slowed your box down?”
o “What did the surfaces feel like?”
Use describing words like “slippery,” “smooth,” “rough,” and “sticky.”
Explain: “Rough ramps make more friction. That means they slow things down. Smooth ramps don’t have much friction, so things slide faster.”
Learning Outcomes:
-
Builds vocabulary around texture and movement
-
Encourages comparing and predicting
-
Introduces the concept of friction in a hands-on way
-
Supports science exploration and gross motor skills
14. Germs in Hiding
In this experiment, learners will explore how germs move from one place to another—and how soap helps get them off.
Glitter will stand in for germs so that students can see where the “germs” go and how hard they are to clean off. This is a demonstration-based activity with lots of chances for learners to observe and share their thinking.
Materials Needed
- Glitter
- Lotion
- A small container or plate for mixin
- Water in a large bowl or tub
- Hand soap
- Paper towels
- Magnifying glasses
- Optional: disposable gloves
- 5 classroom objects (e.g., pencil, cup, block, crayon, book)
- Talk About Germs
Start with a question:
“Have you ever seen a germ?”
Let students look at their hands with a magnifying glass. Ask:
• What do you see?
• Do you see any germs?
Explain: Germs are very, very small. We can’t see them with our eyes, even when we look closely. Some germs are helpful. Others can make us sick.
- Show the Glitter “Germs”
Hold up a small container with glitter. Say:
“These sparkly pieces are pretend germs. They’re much bigger and shinier than real ones, but they’ll help us see how germs can move.”
Squeeze a little lotion into a small bowl or plate. Add one spoonful of glitter. Mix well.
Optional: Put on gloves. This experiment works better without gloves—so the teacher can show how the “germs” hide in places like under fingernails.
Rub a bit of the glitter-lotion mix onto your hands, as if putting on regular lotion.
Let students use magnifying glasses to look at your hands. Ask:
• Where do you see the most glitter?
• Is it hiding anywhere?
- How Do Germs Spread?
Place 5 clean classroom items on a table. Let students use magnifying glasses to examine each one. Ask:
• Do you see any glitter germs?
• Which ones look clean?
Now, while students close their eyes or turn away, secretly touch 2 of the items with your glitter-covered hands.
Let students examine all 5 items again with magnifying glasses. Ask:
• Can you find the items with germs?
• What do you think made the germs move there?
Explain: Germs move when we touch things. They can travel from one place to another—without us even seeing.
- Can We Get the Germs Off?
Try wiping your hands with a paper towel. Ask:
• Do the germs come off?
Let students look closely at your hands with magnifying glasses.
Now try rinsing your hands in water.
Hold your hands in the bowl for a count of ten. Take them out. Ask:
• Do the germs come off in just water?
Let students look again using magnifying glasses.
Next, use soap and water.
Rub your hands with soap, then rinse well.
Let learners take one last close look. Ask:
• Are there still germs hiding anywhere?
• Did anything stay stuck?
- Wrap-Up Discussion
Gather students together and ask:
• How do germs move from place to place?
• What happened when we touched clean objects with “germy” hands?
• What did we try to get the germs off?
• Did wiping germs off work?
• Did rinsing with water work?
• What worked best?
You can also ask:
• Where might germs hide on our hands?
• What should we remember when we wash our hands?
Learning Outcomes
- Models how germs spread through contact
- Helps learners make detailed observations using magnifying glasses
- Shows how soap helps remove germs
- Encourages discussion, questioning, and noticing details
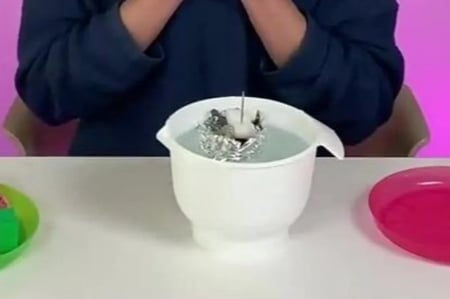
15. Magnetic or Not?
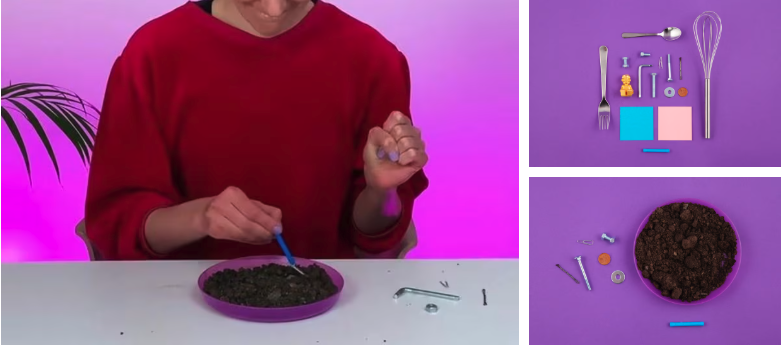
In this experiment, learners explore magnets through hands-on discovery. They begin by observing a magnet’s look and feel, then go on a “magnet walk” to test which classroom objects magnets stick to. After sharing their findings, learners sort a mix of items into groups—those that are magnetic and those that aren’t—building early science skills like observation, prediction, and classification.
Materials Needed:
- Magnets
- Sticky notes
- Objects that do and do not stick to magnets
- Two different colored plates
- Strong magnets (for extension)
- Plates of dry soil or sand (for extension)
- Small metallic objects (e.g., screws, hairpins, paperclips) (for extension)
Instructions:
- Hand out magnets to the learners. Say, “This is a magnet. Let’s explore what it can do!” Ask learners to feel and look at the magnet. What does it feel like? What color is it? Have they seen one before?
- Next, go on a magnet walk around the classroom. Learners should gently test the magnet on different surfaces or objects. If it sticks, they place a sticky note on it. Encourage them to notice what the object is made of.
- Come back together and talk about the findings. Ask:
• Where did your magnet stick?
• What kind of object was it?
• What was it made of?
• Did others find the same things?
- Use this time to introduce the word “metal” if appropriate. Point out that many of the things that stuck were metal—but not all metal items will stick.
- In pairs, give each group a bag with a mix of items—some that stick to magnets and some that don’t. Set out two plates for sorting. Have each learner choose an item, predict if it will stick, then test it. Place the item on the plate that matches: “Sticks to magnet” or “Does not stick.”
- After testing all the items, look at the two plates. Ask:
• What do you notice about the objects that stick?
• What do they feel or look like?
• Are they all made of metal?
• Do all metal things stick?
This is a good moment to clarify: not all metals are magnetic.
Learning Outcomes
- Observe how magnets work
- Practice classification based on certain characteristics
- Make predictions based on experience with magnet function
- Respond appropriately when sharing ideas with peers
Encouraging Curiosity and Discovery
As we wrap up our exploration of play-based science activities for preschoolers, it's clear that the journey of discovery is as boundless as the curiosity of the young minds we aim to inspire.
These activities are not just lessons; they are invitations to engage with the world in a way that is meaningful, joyful, and deeply educational.
By integrating these simple experiments into the learning journey of preschoolers, we do more than teach them facts; we ignite a spark of wonder that has the potential to grow into a lifelong love for science.